1.1.3 Using blocks to aid navigation
.
3. Instruction
3.4. Create a customized navigation using the HTML block
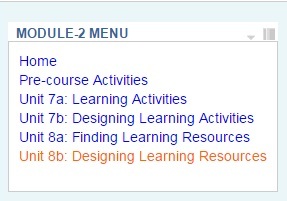
As you saw in the "Example" sub-chapter of this lesson there are multiple ways to use the HTML block to aid navigation. The two ideas presented in this lesson are
- add a list of text which is linked to specific sections or resources
- small images that are also linked to specific sections or resources
Let's see together how to create this customized navigation.
Linked text
You need to do the following two steps to create customized navigation with an HTML block.
- Add an HTML block.
- Copy URLs of the sections and resources that you want the menu to navigate to.
- Insert text and link it to sections or resources.

- To add an HTML block you have to Turn editing on and from the Add A Block drop down menu select HTML
- Go to the page, resource or section that you want the menu to navigate to. Copy the URLs from the browser window by using the CTRL + C or Right mouse click + Copy. Paste URLs temporarily to a document. You may use a Notepad or other aid to keep the copied links.
- In the Configuring an HTML block page that appears, and in the Content section you will see the common Moodle text editor.You will be able to type in the text you want to link.
- Type in the text you want to hyperlink and select it.
- Then from the editor toolbar click the Insert / edit link button
![]()
-
- Insert one of the URLs you temporarily stored in a document.
- Repeat these three steps for other text you want to link.
Linked images
There are multiple steps you will have to go through consisting of:
- Using external image editor to create images.
- Add an HTML block.
- Create a table inside the HTML block.
- Insert images to the table and resize them.
- Link images.
![]()
- You may choose various tools to prepare small images that will serve as navigation icons or buttons, such as MS PowerPoint, or Inkscape or GIMP, which are a free tools.
- To add an HTML block you have to Turn editing on and from the Add A Block drop down menu select HTML
- In the Configuring an HTML block page that appears, and in the Content section you will see the common Moodle text editor.You will be able to create a table that will help to align the images.
- In the text editor click the Insert /edit table button.
![]()
-
- To recreate the navigation from the example, you will have to create a table with three columns and two rows. Make sure that the border is set to "0", so it will be invisible.
- Once the table is added click inside the first cell and then in the text editor click Insert / edit image button.
![]()
-
- Upload the first image to be used as a button and resize it if necessary using the Appearance tab and Dimension option in the Insert /edit image wizard. Note that you can use pixels (e.g. 50 px) or percentage (50%) to indicate the image dimension. Tick the
- After the image appears in the table, select it with the mouse and then in the text editor click the Insert / edit link button.
![]()
-
- Insert the URL of the page or resource you would like this button to be linked to.
- Repeat the last three steps for other buttons.
Hint - How to find link to the summary page of all Activities or Resources of a certain type?
Moodle automatically creates summary pages listing all the Resources or Activities of certain type. The "Example" sub-chapter presented the Forums summary page. When you add an Activity block, the links to the summary pages are easily accessible. However, you may also figure out the URLs of the summary pages without adding the block.
If your course has the URL
http://yourcourse.com/moodle/course/view.php?id=66
the link to the Resources summary will be
https://etrp.wmo.int/course/resources.php?id=66
...to the Quizzes summary page will be...
http://yourcourse.com/moodle/mod/quiz/index.php?id=66
...the link to Forums summary...
http://yourcourse.com/moodle/mod/forum/index.php?id=66