2.3.2 Collaborative writing using Glossary
| الموقع: | WMO Education and Training Programme |
| المقرر: | Calmet Moodle Unit 2 - Provide learning resources |
| كتاب: | 2.3.2 Collaborative writing using Glossary |
| طبع بواسطة: | مستخدم ضيف |
| التاريخ: | الأحد، 26 يوليو 2026، 2:17 PM |
الوصف
....
1. Introduction
Glossary is a tool that you can use in many different ways but it's main objective is to create online dictionary for special purposes such as satellite meteorology or aviation meteorology. You can use it also to create a space for sharing past exam questions or even creating new exam questions.
It is possible to create only one Main Glossary and many Secondary Glossaries at the course level. Entries from Secondary Glossaries are shown up in the Main Glossary. However, on your course you can have only Secondary Glossaries. There is no need to create Main Glossary if there is no purpose for it.
Moreover there are some features that can help you to make creating Glossary more active:
- You can decide whether only teachers can add entries to Glossary or you can allow students to do it. If you choose the second way it can be some kind of activity for them. To make this tool more interactive you can allow adding comments or rating and grading entries.
- You can also choose whether entries can be edited or not. By default students have only 30 minutes to change entries but you can allow them to modify entries any time they want.
- Adding entries is approved by default. However you can change it and entries will be visible for everybody only after teacher approval. It is useful feature if you ask students to create e.g. question bank. Then you can choose the best questions and pick them for an exam.
It is possible to use Glossary also for learning purposes. You can add a block Random glossary entry on the main course page and than choose if entries will appear randomly or in order (last modified entry, next entry, alphabetical order). You can change the location of this block to make it more visible for students e.g. somewhere on the top of the course page.
2. Example
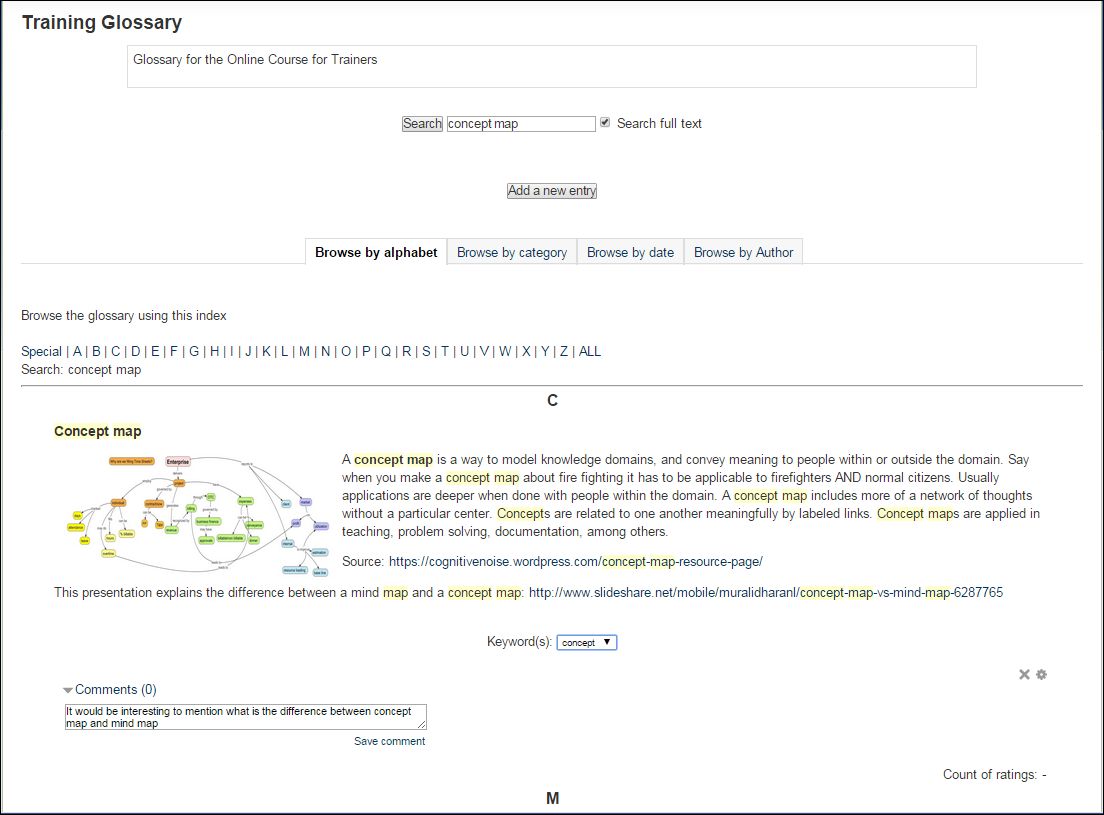
Here you have an example of Glossary from Train the Trainers course.
Let's imagine that we don't know nothing about concept maps and we would like to find out what it is.
To do this we can search concept map and if this phrase appears somewhere in the Glossary we will see the result of our searching.
3. Instruction
In the next sub-chapters you will see how to:
- create a new Glossary,
- add and modify entries to this Glossary,
- add Random Glossary Entry Block on the main course page.
3.1. Create Glossary
|
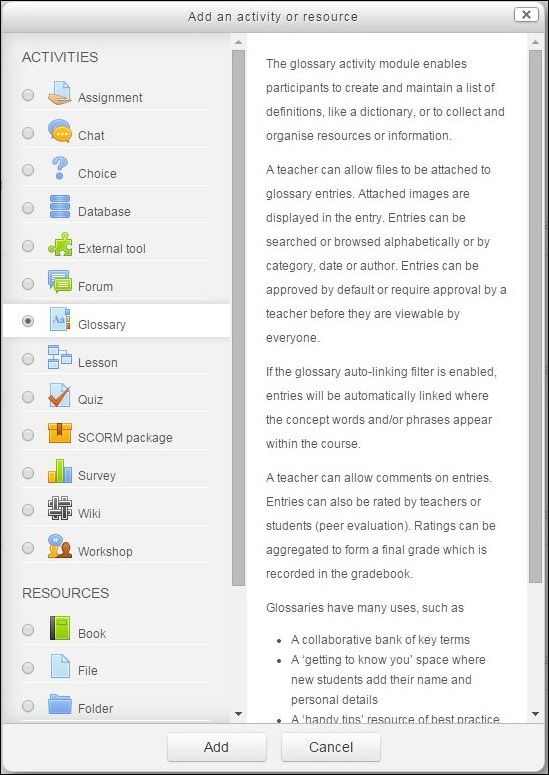
First of all go to the main course page and click the Turn editing on button at the top right of the course page. Then click Add an activity or resource link, then in the activity chooser select Glossary, then click the Add button. |
 |
|
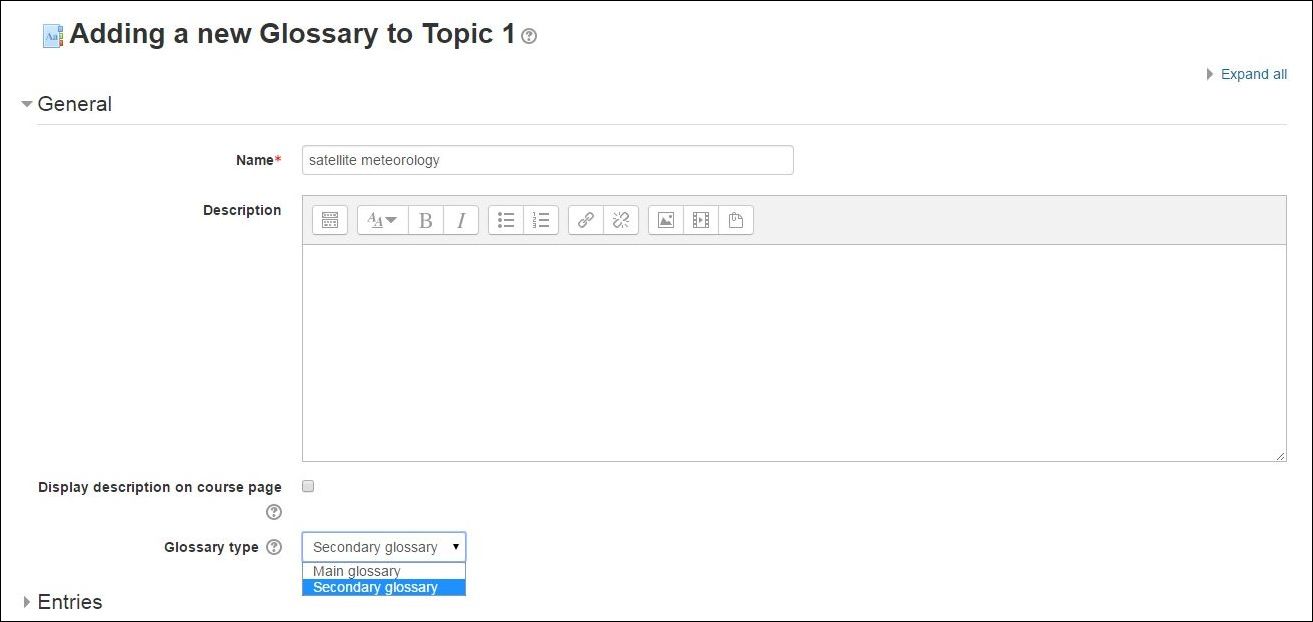
Then enter the name of the Glossary and add some description if you want. In this step you will have to choose if you want to create Main or Secondary Glossary. By default it is a Secondary Glossary and we don't have any reason to change it. |
 |
|
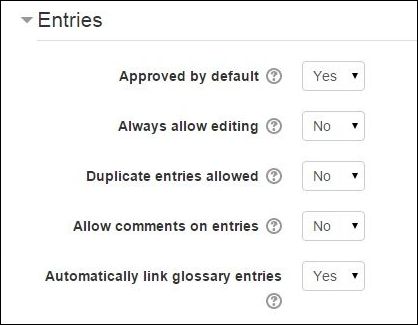
In the next sections you will have to decide what to so with entries settings. It will depends on the purpose of this glossary. As teachers this time we don't want to check entries before publishing so we leave Approved by default with Yes. But we want to allow everybody comment these entries. Moreover, we want to give an opportunity to change entries if it's necessary because maybe something will have to be changed or maybe the author of the entry will have some new ideas which should be added to the entry later. |
 |
|
In the end we have to decide whether we want any ratings and grading or not. The rest setting are common for adding many Moodle activities and resources. |
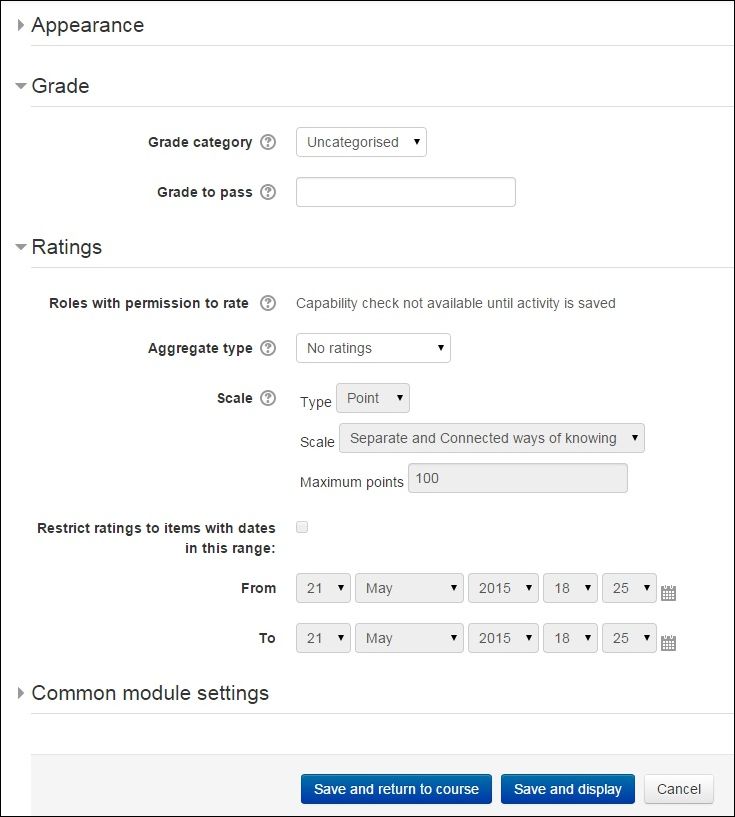 |
| When you finish changing settings click Save and return to course or Save and display to see the file in your course. |
3.2. Add entries
|
Now we have created a Glossary we can start adding some entries to it. To do it we should go to Glossary and click Add a new entry button. |
 |
|
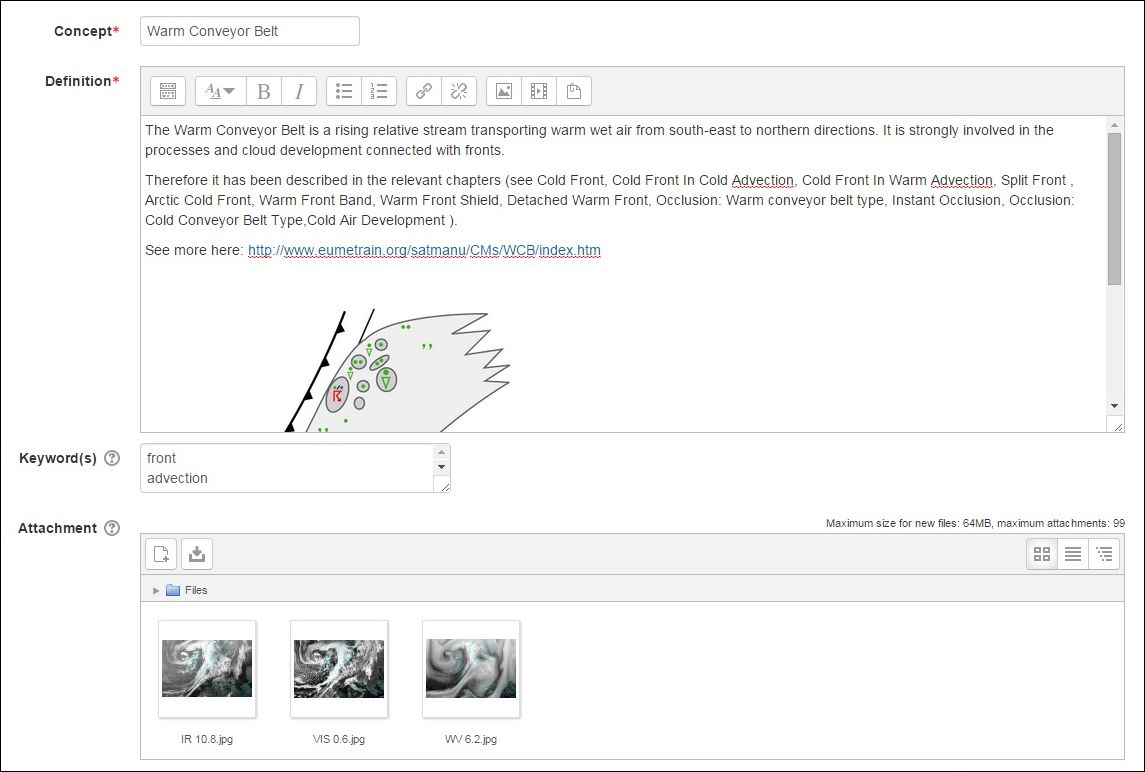
In the new window we should enter the name of the concept and write the definition of this concept. It's possible also to add hyperlinks, images and media. Moreover, it is worth to add some key words that will help to find this concept in glossary. To do it, you enter the key word on the proper place. If you want to add more than one keyword you can separate new ones by clicking Enter button. Then every keyword will be on a new line. Separating keywords by commas doesn't work. To make an entry more clear it's better to put some additional materials in the attachment. |
 |
|
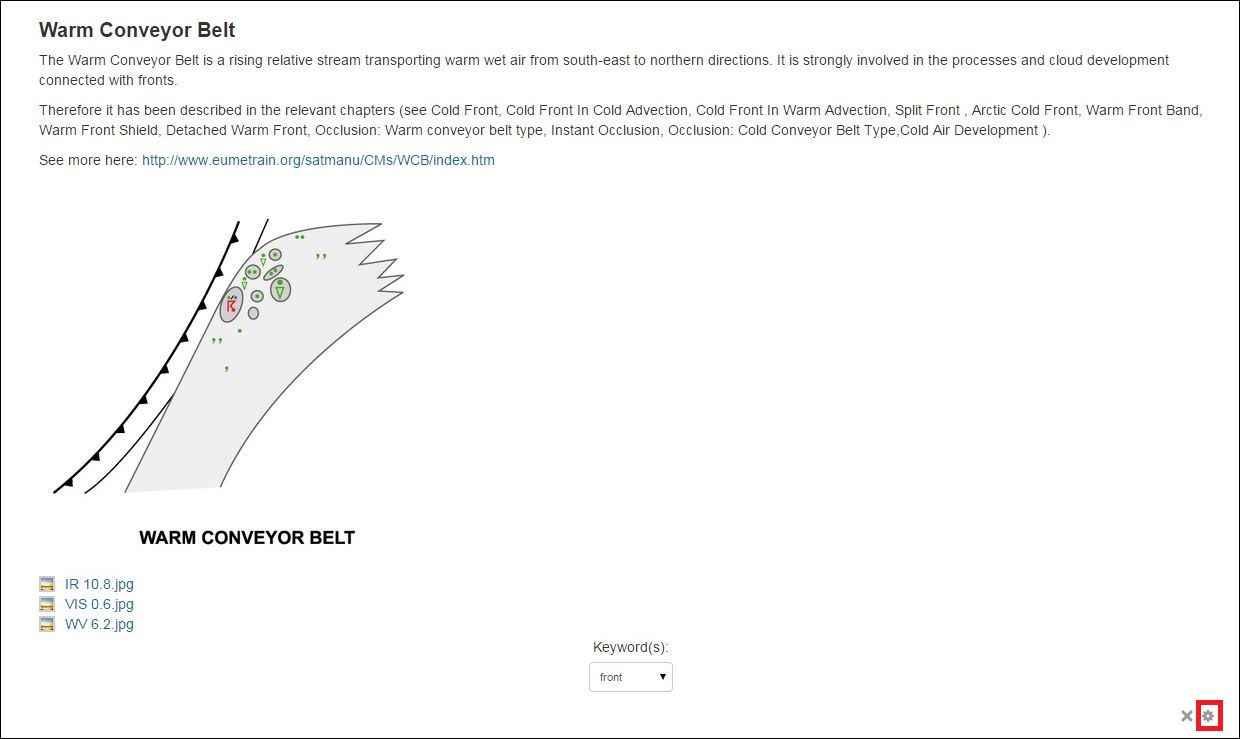
Then everybody who would like to see information about the concept can find it in attachments. In the end click Save changes in the bottom of the page. If you want to change the entry, just click an icon (in red frame) in the bottom of the entry. |
 |
3.3. Add Random Glossary Entry Block
|
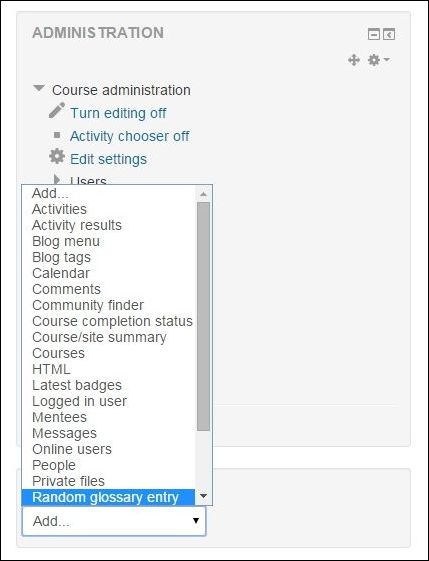
Once you have created a Glossary you can use it on the main course page. Every time students visit the course page they will have a chance to read about one of the concepts To do it go to the main course page and click the Turn editing on button at the top right of the course page. Then on the main course page the new block Add a new block will appear. Choose from it Random glossary entry. |
 |
|
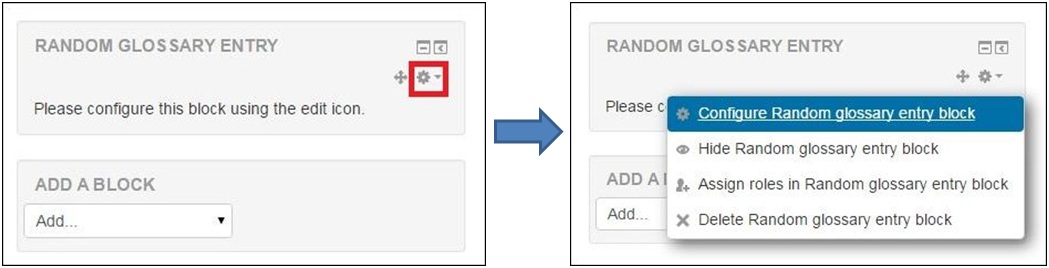
Then you have a new block on the main page that you have to configure. To do it click icon (in red frame) and go to Configure Random glossary entry block. |
 |
|
Then all you need is to change settings. If you have more than one Glossary on your course page you will have to decide from which Glossary entries will appear on this block. It is also important to choose how a new entry will be chosen. You can decide whether it will be last modified entry, next entry or alphabetical order. |
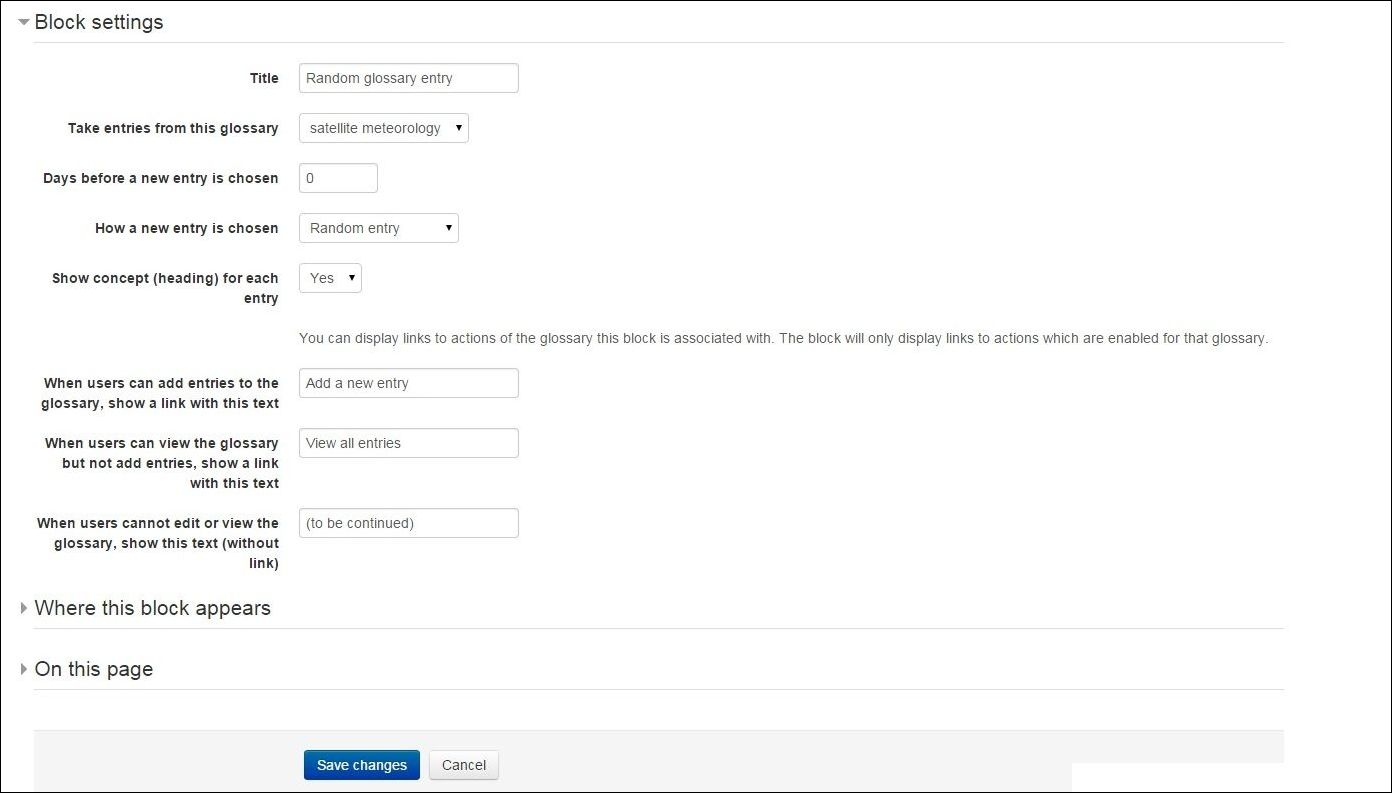 |
| You can change also some other settings if you wish. Otherwise click Save changes button. |
4. Practice
Now go to your own practice area and try creating you own Glossary. (For help see the front page of this unit.)
If you need assistance using Moodle Demo please check out the instructions on this Unit front page
1. Click the Turn editing on button at the top right of the course page.
2. Click Add an activity or resource link, then in the activity chooser select Glossary and click the Add button.
3. Enter the name "Radar Glossary" and write in the the description "Glossary about radar meteorology issues" then click box Display description on the course page.
4. Change settings in Entry section: Always allow editing--> Yes, Allow comments on entries-->Yes and click Save and display.
5. Click Add a new entry button.
6. Enter the concept name "Attenuation" and the definition "Atmospheric attenuation is the loss of radar energy due to absorption and/or scattering as it passed through the atmosphere."
7. Add key words: "measurement", "radar", "absorption" (each keyword on a new line - use Enter button on your keyboard).
8. Change setting in Auto-linking section: This entry should be automatically linked--> Yes and click Save changes button.
9. Go to you main course webpage and find block Add a block, then choose Random glossary entry.
10. Do to configuration this block using the edit icon.
11. In Block settings section change How a new entry is chosen-->last modified entry.
12. In On this page section change Region-->right and weight--> 0 and click Save changes button.