2.2.1 Working with files
| Site: | WMO Education and Training Programme |
| Course: | Calmet Moodle Unit 2 - Provide learning resources |
| Book: | 2.2.1 Working with files |
| Printed by: | Guest user |
| Date: | Monday, 25 May 2026, 7:55 AM |
Description
....
1. Introduction
What is the file picker?
The File Picker enables files to be selected and displayed in Moodle - for example, when an editing teacher clicks Add an activity or resource > File, or when a forum participant adds an attachment to a post. File Picker is used to upload files to your course.
File Picker can also be used to link to files in an external repository, if it has been enabled by your administrator, such as Dropbox, Youtube, Wikimedia, Google drive.
Usually the file is copied into Moodle from wherever you have chosen it (e.g. a repository or your computer), though for certain repositories, such as the YouTube videos repository, a link is created, and in some situations an alias/shortcut may be created.
2. Example
In this example the File Picker was used to add the image below.
This image was added from a file on my computer and File Picker allows me choose the file and uploaded it to the Moodle site.
3. Instruction
You can upload files to your course from your computer or network. Alternatively you can use a file that you have stored in the cloud e.g. Dropbox.
In the next four sub-chapters you will
- See how to upload a file from your computer or network - using drag-and-drop
- See how to upload a file from your computer or network - using File Chooser
- Use files in the My Files area on Moodle
- See how to upload a file from a repository (in this case Dropbox).
You do not need to worry about deleting files. Moodle will delete unused files after 4 days.
3.1. Uploading Files - Drag and Drop
Let's say we want to add a pdf file to our course. In this case I'm going to add it to my Meteo Bookie book. I have turned on editing and can add an activity or resource to my Book.
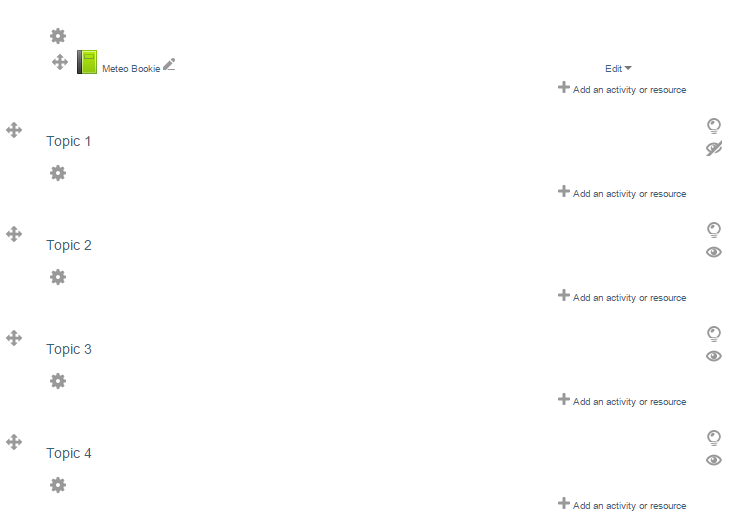
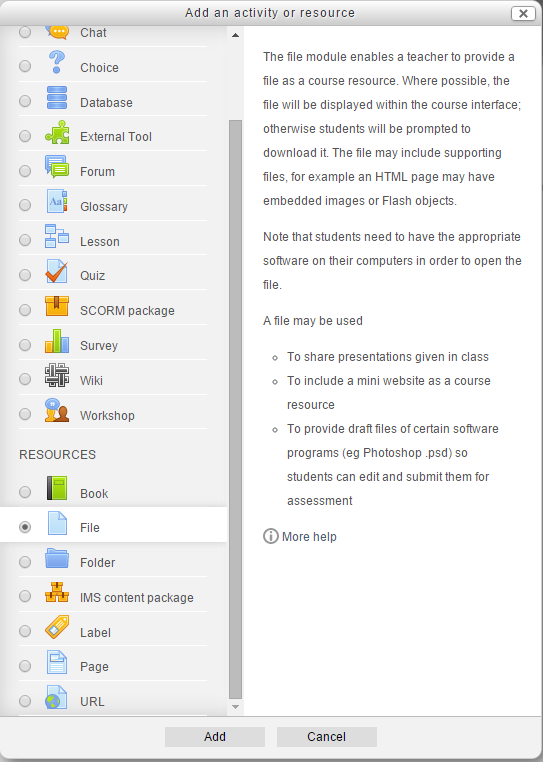
Clicking on Add an activity or resource opens a popup window. Choose File and click Add.
Now simply drag the file from your computer File Explorer/Finder to the Drop files here to upload box on your Moodle page.
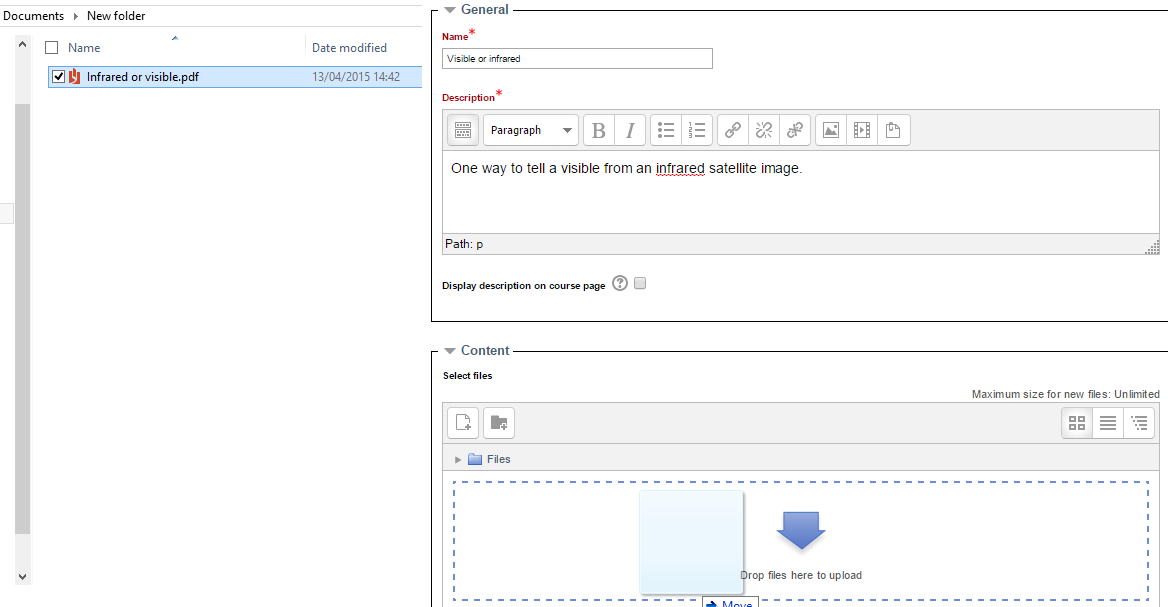
Once uploaded the file appears in the Files box.
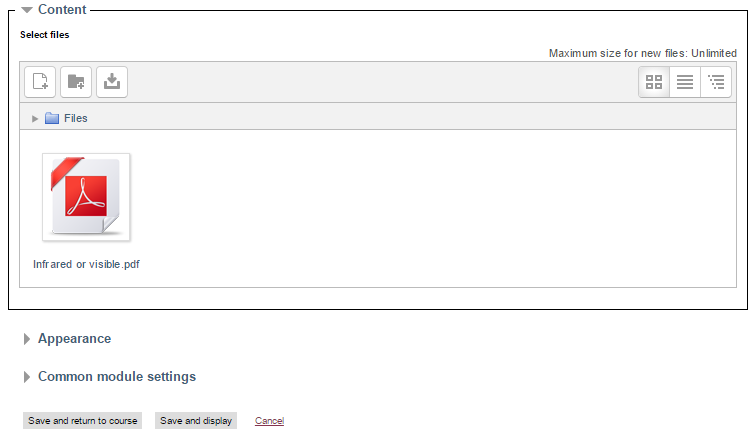
Click Save and return to course or Save and display to see the file in your course
Save and return to course returns you to the page where you added your resource. You are still in editing mode.
Save and display takes you to a page which allows you to update or view the file.
3.2. Uploading Files - File chooser
An alternative method of using files in a Moodle course would, for example be to add a picture to a web page you have created. In this case Moodle will ask you to choose a file in the File Chooser.
Let's see how we add this image to a page:

Click on the Insert/edit image button from the button bar:

The Insert/edit image dialog box will open:
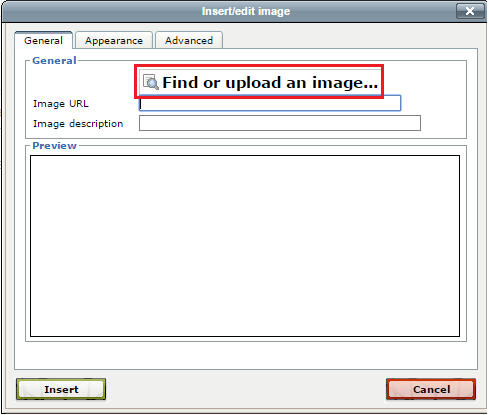
Click on the Find or upload an image... button. This will open the File picker allowing you to use the Choose file button to pick the file you wish to use. In the image below we can see the file picker on the right and the dialogue box that opens to allow you to choose the file from your computer you want to upload.
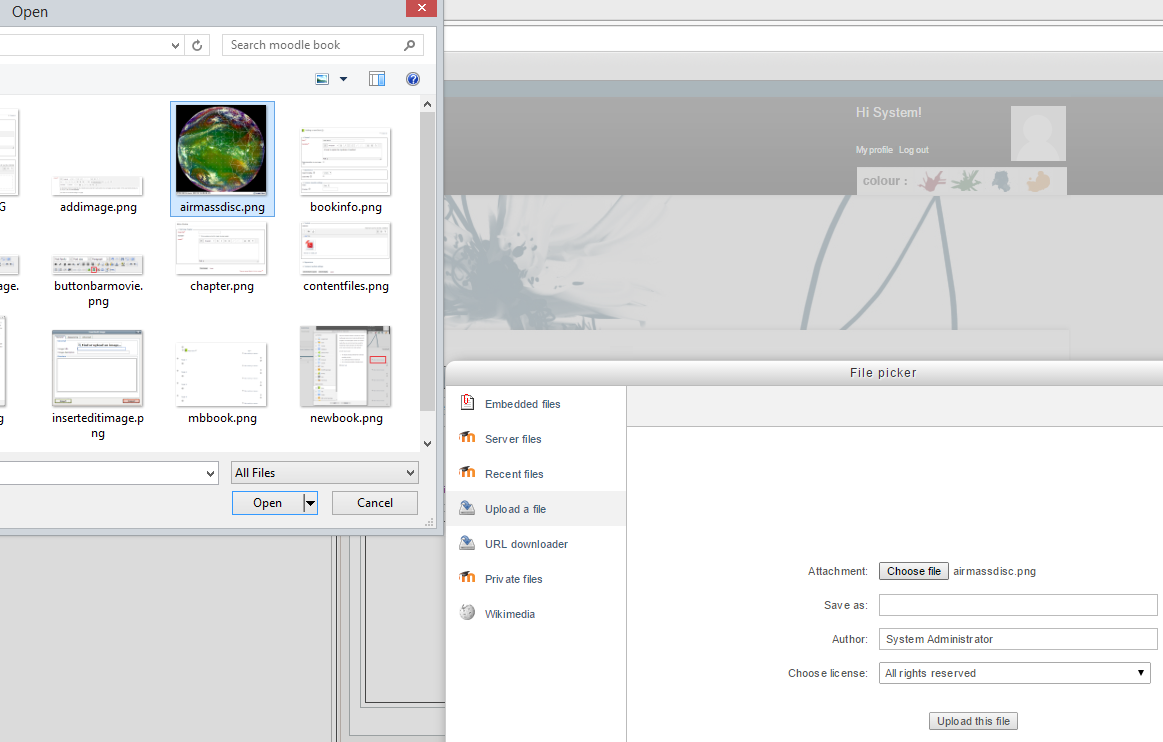
Choose the file you want and click the upload button to upload the file to your Moodle course.
3.3. My Private Files
In Moodle, each user has a private files area for uploading and managing a set of files.
The private files area is accessible via Navigation > My home > My profile > My private files or the My private files block. If the private files repository is enabled by a site admin, it is available as a source within the file picker when selecting files to use in a course.
To add a file to your private files area
- On the Navigation menu, click My profile > My private files
- The file manager will appear.
- If desired, create a folder for your file(s)
- Click on the Add button to upload from the File picker or drag and drop from your desktop. It will look like the files are already there, but they aren't until you do the next step!
- Click the 'Save changes' button

- Once uploaded, files will appear as thumbnails. Clicking the icons top right will display them in table or list view as an alternative.

Making an alias/shortcut to a file in the private files area
If a file is uploaded into your private files area, it is possible when using it elsewhere on Moodle to select it as an alias/shortcut. This means that if you update the file in your private files area, it will automatically update elsewhere on Moodle.

3.4. Providing resources via an external repository
If this option has been enabled by your administrator it is possible for users to use external repositories to copy or create a shortcut or alias to their files in repositories such as Dropbox, Google Drive or Microsoft's OneDrive. For a full list of all the repositories that can be used with Moodle see Managing repositories in Moodle docs.
The Moodle site administrator has to install some plug-ins and fiddle with some other stuff. Instructions on how to do this for the more common repositories can be found here:
4. Practice
Now go to your practice site and upload a document file and an image to the site.
If you need assistance using Moodle Demo please check out this link.
Remember that once a file has been uploaded to your Moodle site you may use it in more that one location without having to upload the file a second time,
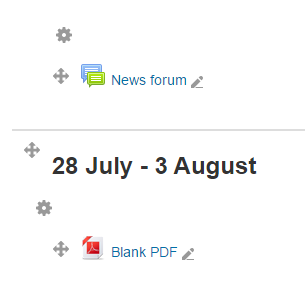
My file, Blanck.PDF, uploaded:
How I did it:
- Logged into demo site as a teacher
- Choose My second course
- Turned editing on
- In the second topic from the top I clicked Add an activity or resource
- From the pop-up menu I choose File and clicked Add at the bottom of the dialog box.
- In the page that opened I filled in the name of the document (and a description).
- Opened Windows Explorer to display the file and dragged it to the box at the bottom of the windows
- Clicked Save and return to course the file appears on the site!