2.1.3 Create a Lesson
| الموقع: | WMO Education and Training Programme |
| المقرر: | Calmet Moodle Unit 2 - Provide learning resources |
| كتاب: | 2.1.3 Create a Lesson |
| طبع بواسطة: | 访客用户 |
| التاريخ: | الأربعاء، 24 يونيو 2026، 4:40 AM |
الوصف
....
1. Introduction
Lesson is an activity that allows engaging the students in various ways and with different purposes. It can be a good tool for creating individualized or sequenced learning pathways and be used as a scaffolding activity. As such, it is a very flexible tool for teachers.
However in this context we will focus on such applications of the Lesson activity, which can best support the delivery of courses for professional development in the domain of hydro-meteorology.
Technically the Lesson consists of pages (see "Page activity") which may have content for the students to read or questions for them to answer.
In terms the Lesson can:
- Provide content
- Provide content in conjunction with practice and or assessment
- Allow students to process information at their own pace
You need to have a clear idea beforehand of what you want to do with this lesson. Is it to be a graded, linear learning experience? Or an ungraded, non-linear practice session? Will students be able to go back and revisit areas or is it just a once-only opportunity?
2. Example
Lesson activity is and authoring tool that enables you to create content similar to COMET lessons. One of the things to remember is that the Lesson can be used only internally in Moodle. That means it cannot be published and used outside of Moodle environment or downloaded for offline viewing.
Linear content like a COMET lesson
COMET lessons are divided into pages that include text, images, animations and questions. COMET lessons can be navigated by using a navigation block.
This is quite easy to replicate with a Lesson activity in Moodle. Images, text and videos can be included in a Content page. Questions have to be inserted on a separate Question page, but you will be able to decide where the page is added. Before starting to build a Lesson design it first. Think how many Content pages and Question pages you need, and how they should be sequenced. It will make your work easier and the result more appropriate for the scope.
Branching scenario to practice a forecasting process
Build several Content pages which demonstrate different meteorological parameters or products. Insert a Question page wherever the forecaster is asked to make a decision. For example after seeing various products forecasters are asked to decide whether or not to issue a warning. Branch to a specific Content page depending on the decision made.
You may also try this example about application of Lesson to decision making exercise (log in as student in the Moodle environment):
3. Instruction
The instructions are broken into more steps. Check the sub-chapters for details.
3.1. Creating a Lesson Activity
Step 1 - Adding a Lesson activity
- Login to your Moodle site and go to the course page where you wish to add the activity. Turn editing on and wait for the page to refresh.
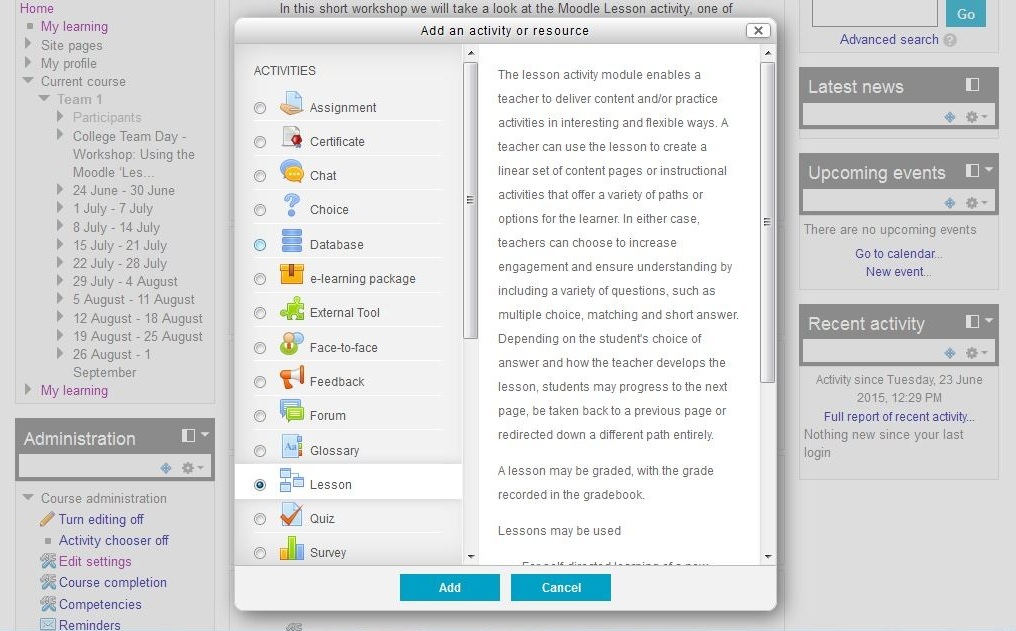
- You should now see a new set of editing options in various areas of the course page. Choose a suitable topic area and click on the Add an activity or resource link.
- From the pop-up window select the Lesson activity and click Add.
- The page will reload and you will be presented with the Adding a new Lesson page, this is the settings page for your Lesson activity where you can tell Moodle the details about your Lesson and how you want it to behave.
Step 2 - General settings
- Under General, in the Name field enter a name for your lesson; this is the name that will appear as a link on the course page.
- Now you need to fill in the other fields on the settings page. To make this easier you can click the Expand all link in the top right of the settings page.
- For Progress bar select Yes.
- For Display left menu select Yes
- Leave all other options as default and scroll to the bottom of the page and click the Save and display button.
3.2. Adding content and navigation
Step 1 - Adding content page
- Now you have your new Lesson activity, there will be a link to it on the course page for the students but at the moment you don’t have any pages in your Lesson.
- Within the Lesson, click on the Add a content page link to create your first page. The page will refresh and you will see the Add a content page form.
- Under the Page title heading, enter a title for your first page.
- Now you will enter the content for your first page.
- Under the Content heading you will see a small word processor window; anything you enter in here will form the content for your page.
- Type or paste some text into the content editor.
Note that like in any area where there is the Text Editor available, you may add images and videos. For more instructions on the Text Editor check Unit 1.
Step 2 - Adding navigation buttons
- You will need to add navigation buttons to your pages so your student can move to the next page. Under the Content 1 heading, in the Description field enter the word ‘Next’ and for the Jump field select Next page.
- On your first page you do not need to enter a previous button so you can leave the rest of the options as default and click the Save page button.
- On subsequent pages you will need to add a previous button so that your learner can navigate back through the lesson.
- As you want your Previous button to appear on the left and your Next button to appear on the right of the page you will need to enter the word ‘Previous’ in the Description field under Content 1, selecting Previous page from the Jump menu and then enter the word ‘Next’ in the Description field under Content 2 and select Next page from the Jump menu.
3.3. Adding Questions
To create a Question page click on the Add a question page link. The page will refresh and you will see the Create a question page form. The Select a question type menu gives you the choice of Essay, Matching, Multichoice, Numerical, Short answer or True/False.
In the Page title field enter the question title (e.g. Question 1) and in the Page contents editor add the question text. You can also add images to the question by following the Add image instructions above.
For a correct answer ensure that there is an associated score and that an incorrect answer has a score of 0. In the Response sections add a comment as to whether the answer given is correct or not. Finally click Save page. The above process should apply regardless of the question type selected.
3.4. Adding Lesson clusters and branches
This book has given you the basic instructions to create a simple Lesson activity in Moodle. There are also more advanced features available, such as:
Lesson clusters - A cluster typically contains question pages that are presented randomly to each student who attempts the lesson. You can read more about clusters and how to use them by looking at this link: https://docs.moodle.org/28/en/Lesson_clusters#What_are_clusters.3F
Branches - there are two types of branches. The ordered branch sends the student to a specific page every time. The classic branch offers the teacher a way to randomize what the student sees next in a series of pages. You can read more about branches and how to use them by looking at this link: https://docs.moodle.org/28/en/Branch_structures#Classic_branches
Further information
Further information about building lessons in Moodle can be seen here: https://docs.moodle.org/29/en/Building_Lesson
There are also video tutorials on YouTube:
https://www.youtube.com/results?search_query=moodle+lesson+tutorial
There is also a great blog entry on using the Lesson activity alongside a custom Moodle theme to create some great looking content:
http://lewiscarr.co.uk/2014/08/the-moodle-lesson-activity-truely-is-an-amazing-content-creator/
4. Practice
Recreate a COMET lesson
- Go to the MetEd website and select a lesson of your interest.
- Find a page inside the lesson including text, image or animation and a question.
- Create a Lesson with one Content page and one Question page.
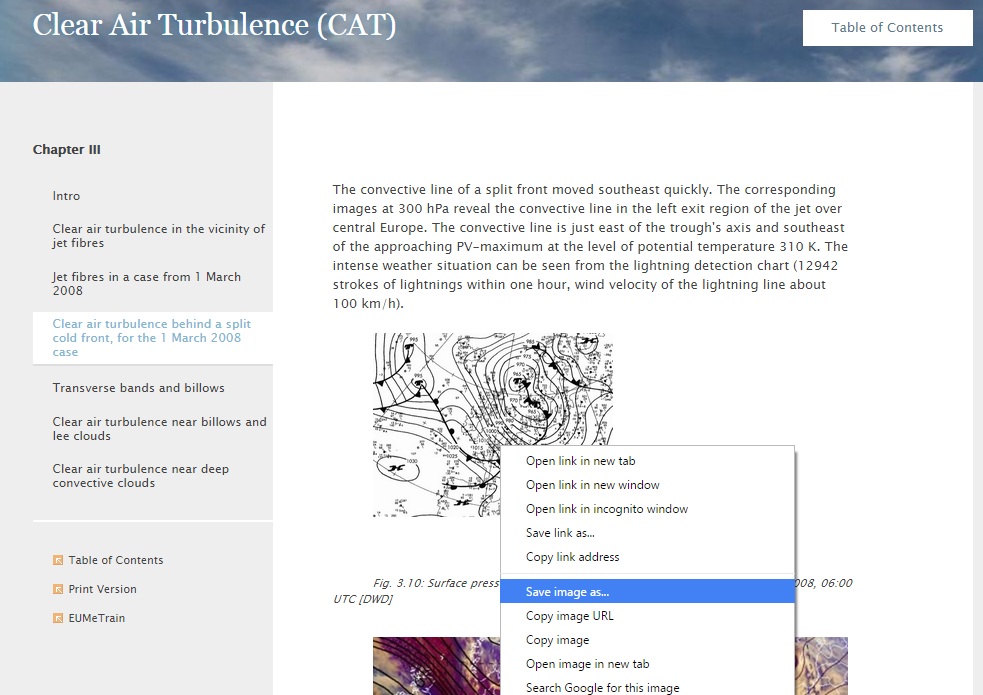
- Copy text, image or animation from COMET lesson and insert them to the Content page. Note that to save images and animations to your PC, you need to right-click the item and click the Save as link. You may also browse all media files for a specific lesson in the Media Gallery included in most COMET lessons.
- Using a Question page build the question copied form the COMET lesson.
Alternatively, if you do not have an account for MetEd, you can also browse EUMeTrain library, which is accessible without registration, to find content created with COMET technology. This page from Chapter III of the Clear Air Turbulence (CAT) module could be a good example:
http://www.eumetrain.org/data/3/304/navmenu.php?tab=3&page=4.0.0
If you use the example above, you may try to build two Content pages and two Question pages.
 |
 |
|
EUMeTrain module To save the image on your computer, right-click on the image and select Save image as. |
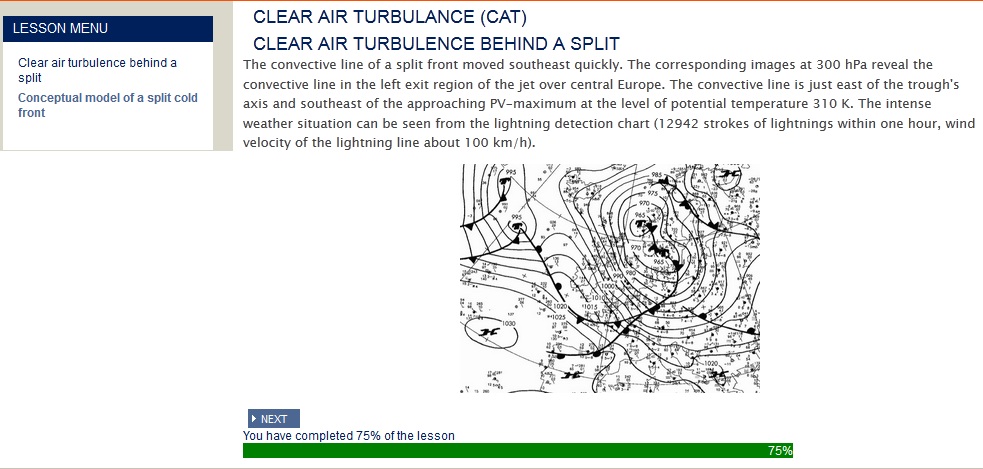
Content of the EUMeTrain module insterd in Lesson |
You can also use your own content.
There are different places where you can practice. You will find the detail instructions on the Course Guide.