1.4.2 Using Groups
| Site: | WMO Education and Training Programme |
| Course: | Calmet Moodle Unit 1 - Design an effective learning environment |
| Book: | 1.4.2 Using Groups |
| Printed by: | Guest user |
| Date: | Sunday, 28 June 2026, 1:41 AM |
Description
.
1. Introduction
The Groups feature allows teachers to divide up the students into groups. Then students can undertake activities within their groups. Groups also allow students to work together more closely, and encourage more participation from each student than they might get in a whole-class exercise. This is especially good practice when there are many students in the course.
You can define the Groups mode used in your courses at two different levels:
- Course level: The group mode defined at the course level is the default mode for all activities defined within that course (this is set in the course settings).
- Activity level: Each activity that supports groups can also have its own group mode defined.
When you are using Groups, you do not need to create one activity for each group. The group mode defined at course level is the default mode for all activities within the course. If the group mode is "forced" at a course level, then this particular group mode will be applied to every activity in that course. Individual group settings in each activity are then ignored. This is useful when, for example, you want to set up a course for a number of completely separate clients or classes. Please note that the Glossary, Lesson, and SCORM activities do not work with groups. Some activities do not behave how you might expect when groups have been applied. Always test an activity after groups have been applied!
There are three modes for Groups:
- No groups: There are no sub groups; everyone is part of one big community. Use this if Groups are not required.
- Separate groups: Each group can only see their own group, others are invisible. Use this if you want complete separation between Groups - so a different Teacher can deal with their own Group, for example.
- Visible groups: Each group works in their own group, but can also see other groups. Use this if you want to have activities undertaken in groups that don't interact directly, but still want to be able to view each other's activity.
2. Example
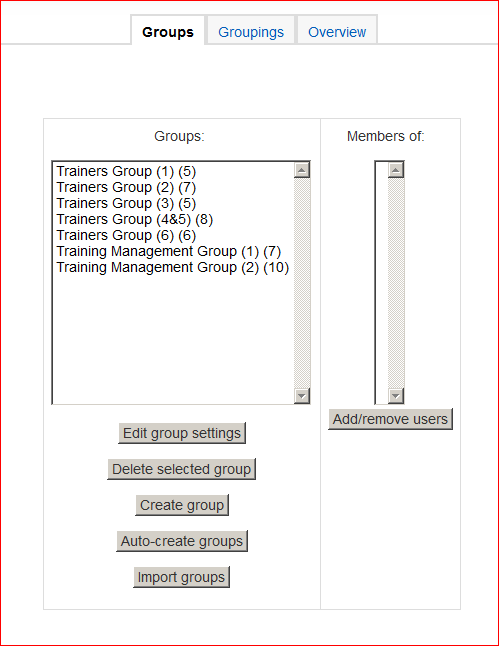
Below is an example of the Groups in Moodle. In the example there are 7 groups as listed and e.g. "Trainers Group (3)" has 5 members.
The screenshot below is from a Forum activity. We can see that this Forum is created for groups to share their work and get peer assessment. As the settings of the Forum are set to Visible groups, all groups can see other groups but cannot post in their group discussions. The Group column shows which group name for each discussion. When a user clicks a discussion he/she can still see the posts, however cannot post or reply if he/she is not in that particular group. In order to post in the discussions, the member/user/participant should choose his/her group from the drop-down list first. Please note that if this was set to Separate groups, users would see only their groups and the Forum activity would work like a separate Forum for each group.
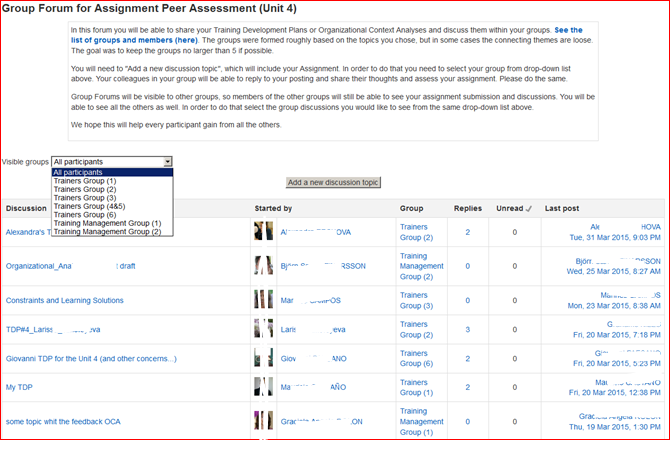
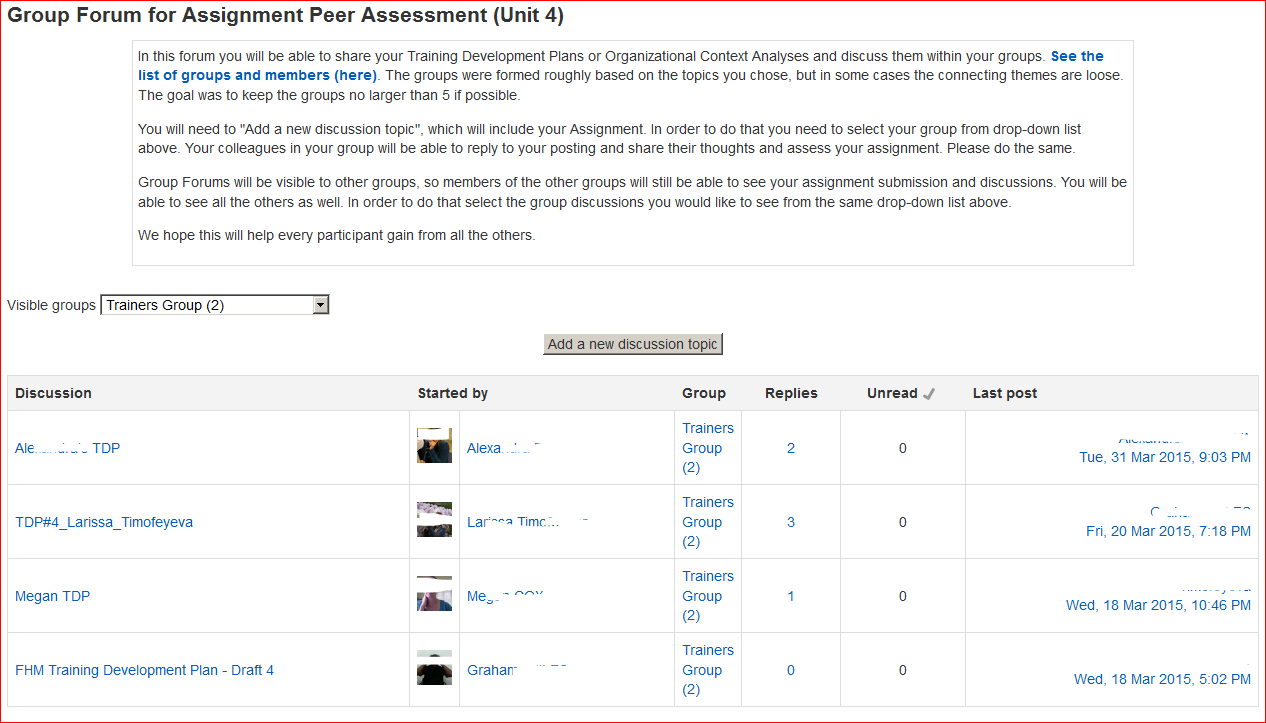
Below you see a screen shot for a "Trainer Group (2)".
3. Instruction
The Groups can be created manually by naming the group, adding members to those groups. However, it can also be created automatically by Moodle and it is especially useful when you have many users and would like to create random groups. The number of groups and number of members in the groups can be defined when creating groups automatically.
Let's see how to create groups manually and automatically.
3.1. Manually Created Groups
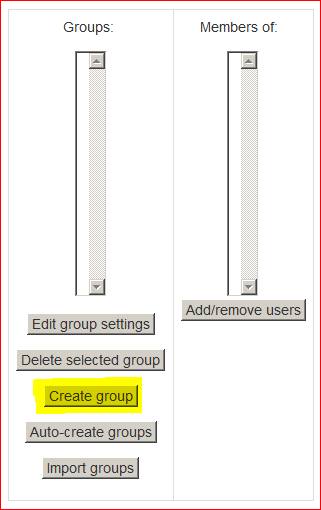
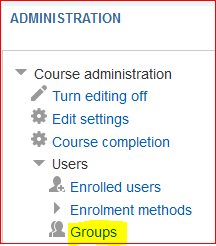
1- Click the Groups in Administration> Course administration > Users > Groups

2- Click "Create group" button
3- Add a group name and optional description. In the example below "Alto-cumulus" is given as group name.
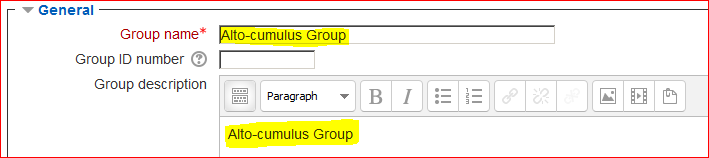
4- Click the Save changes button at the end of the page.
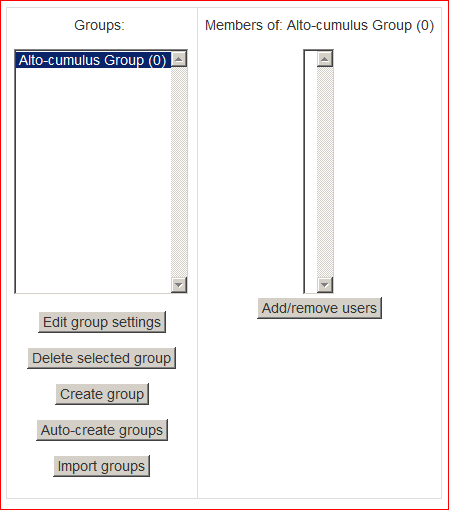
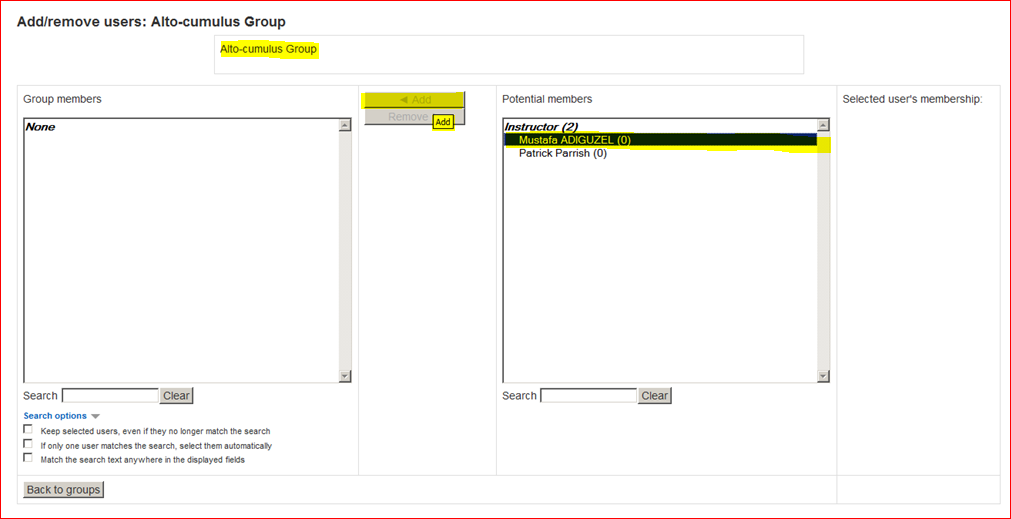
5- Select the group, Alto-cumulus Group, to which you want to add participants, then click the 'Add/remove users' button. In the "Potential members" list, select the users you want to add to the group. Multiple users may be selected using the Crtl key.
5- Click the Add button to add the users to the group
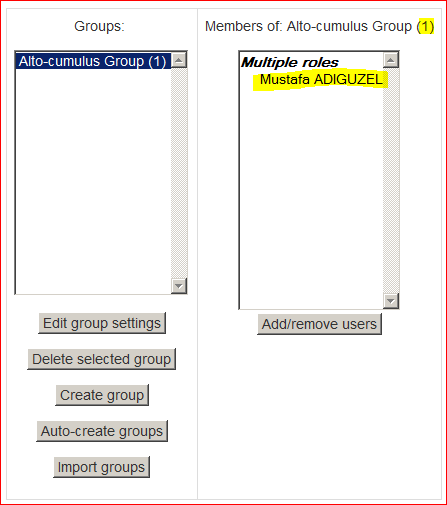
Now you have one member in your group!
.
3.2. Automatically Created Groups
1- Groups may be created automatically via the Auto-create groups button in Administration > Course administration > Users > Groups.

2- A naming scheme can be created automatically. # is replaced by sequential numbers, and @ by letters. For example:
- Group @ will create group with a naming scheme Group A, Group B, Group C . . .
- Group # will create group with a naming scheme Group 1, Group 2, Group 3 . . .
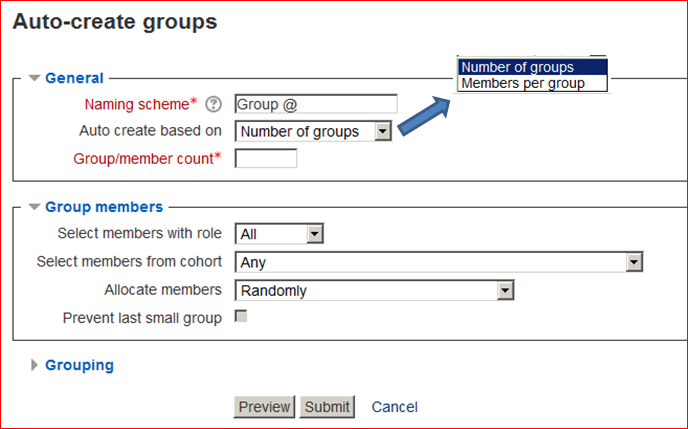
3- You can specify if you would like to create:
- x number of Groups or
- each group contain x number of students
When selecting Members per group the Prevent last small group will allocate additional members to an existing group rather then create a new group with fewer members than x. This setting is found by clicking on the Show More link.
4- Click Submit button to create groups.
4. Practice
Go to your practice area available to you and:
1. Create 4 test users, User-1, User-2, User-3, and User-4
2. Enrol these 4 test users in your test course
3. Create 2 Groups in your test course, Group-A and Group-B
4. Add User-1 and User-2 into the Group-A
5. Add User-3 and User-4 into the Group-B
6. Create a Forum in your test course
7. From the setting of your Forum, set the Group mode to Visible groups
8. Login as User-1, go to the Forum, choose Group-A from drop-down list, add a new topic, and send a test message
9. Logout and login as User-2 and go to the Forum
10. You should be able to see the test message sent by User-1 as you are in the same group, and reply to that message
11. Logout and login as User-3 and go to the Forum, chose Group-A from drop-down list
12. You should still be able to see the message sent by User-1, as the group mode is set to Visible groups, however you should NOT be able to post or reply in the Group-A. Because as User-3, you are not member of Group-A.
13. Chose Group-B from drop-down list
14. You should be able to add a new topic, and send a test message as you are a member of Group-B as User-3
15. You can also practice Separate groups by logging in as admin and changing the Forum settings to Separate groups
16. When you out as admin and login as User-1 or User-2, you should not be able to see Group-B as these users are not member of Group-B and the Group mode is set to Separate groups
17. It should be the same for User-3 and User-4, and when you logged in as these users you should not be able to see Group-A